This post may contain affiliate links. We may receive a small commission, at no cost to you, if you make a purchase.
Read Disclosure
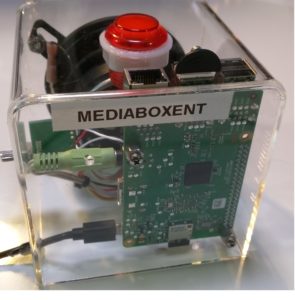
Google Assistant with Raspberry Pi 3
As voice recognition and natural language analysis have improved, the availability of digital personal assistants, from Bixby to Alexa or Cortana to Google Assistant, all leading technology companies continue to develop digital assistants. Recently, Google released its Wizard API for Raspberry Pi 3.
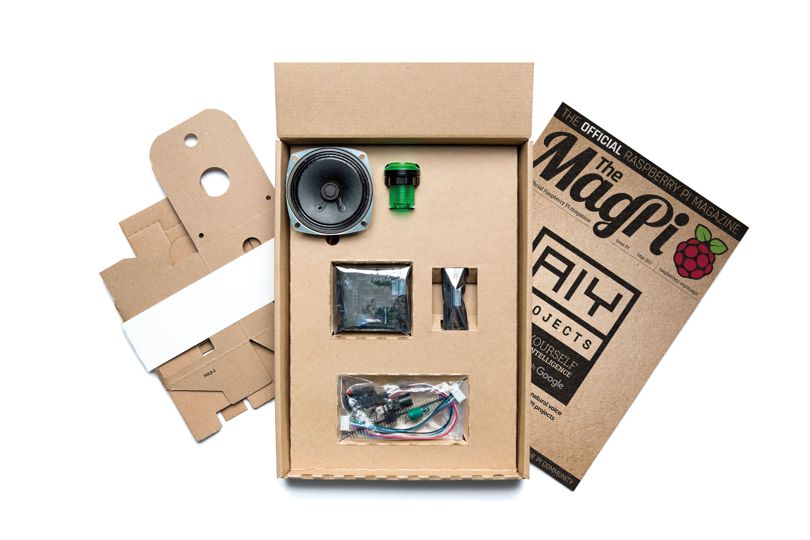
 Google and the Raspberry Pi Foundation launched the “Voice Kit” with a special piece of hardware called Voice HAT (basically a speaker driver and microphone), plus great software to build just that, a Google Home Clone.
However, getting the Voice Kit has been impossible. It was supplied on the cover of MagPi, the official magazine of Raspberry Pi, and was sold in hours.
 Stay Secure Anywhere and Everywhere
What do you need:
To build your own digital assistant you will need:
Raspberry Pi 3 http://amzn.to/2skfFO5
A 16GB microSD card http://amzn.to/2rwLjty
A speaker with a 3.5 mm connector http://amzn.to/2qMmztn or http://amzn.to/2rwgipJ
A USB microphone http://amzn.to/2skhUAL
A simple switch http://amzn.to/2qGBGp5
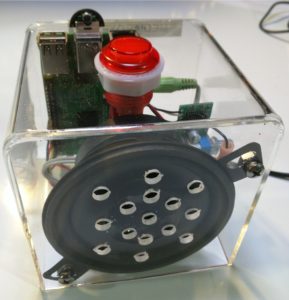
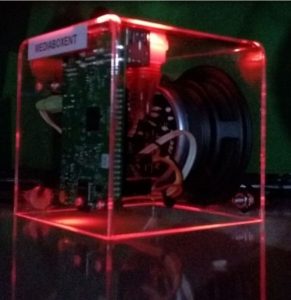
A Box http://amzn.to/2sk2D3b
Top-cofrLD Ultra Small PAM8403 5V http://amzn.to/2qGMzY4
3.5mm Male to Male Stereo Audio Cable http://amzn.to/2qGiNTe
Wires Jumper Cable http://amzn.to/2qGAnqf
Let’s do is take the Voice Kit software and modify it to work with the internal sound card of the Pi and a USB microphone. Then we will make a switch (to activate voice input) and put everything in a box.
The first thing to do is download the microSD card from the Voice Kit for the Raspberry Pi. You can download it directly from the Google AIY project site. Once the .img.xz file has been downloaded, you must write it to the microSD card using a card-writing utility. The Etcher.io tool is a good choice for this, as it is available for Windows, MacOS and Linux. You do not need to unzip the image file, Etcher will take care of it for you.
Recommended Programs:
Create a project
Open an Internet browser and navigate to the cloud console.
GCP uses projects to organize things. Create one for your voice recognition box.

In the Cloud console, click the drop-down button to the right of the “Google Cloud Platform”

From the drop-down menu, click Create Project

Enter a project name and click Create

Once the project has been created, make sure that the drop-down menu has the new project name
1.2. Enable the Google Assistant API

In the cloud console, enable the “Google Assistant API”.

In the cloud console, create an OAuth 2.0 client In the API Manager> Credentials

Click on Create Credentials and select OAuth Client ID
- If this is the first time you create a customer ID, you must configure your consent screen by clicking the Configure consent form. You must name your application (this name will appear in the authorization step)

Select Other, type a name to help you remember your credentials, and then click Create.

A dialog box will appear. Click OK. In the Credentials list, find your new credentials and click on the download icon (Download icon) on the right.
Note: If you do not see the download icon, try to widen the browser window or zoom out.

Find the JSON file you just downloaded (client_secrets_XXXX.json) and rename it to assistant.json. Then move it to /home/pi/assistant.json
Start dev terminal:
Double-click the “Start dev terminal” icon on the desktop. In the terminal window, type sudo leafpad/boot/config.txt and delete # in front of the line dtparam = audio = on and insert a # in front of the two lines below it. exit nano.
From the previous step, the last lines of /boot/config.txt should look like this:
# Enable audio (loads snd_bcm2835)
dtparam=audio=on
#dtoverlay=i2s-mmap
#dtoverlay=googlevoicehat-soundcard
Audio
The next step is to get the audio to work. You will need a speaker with a 3.5 mm jack and a USB microphone. I did not have a dedicated USB microphone on hand so I plugged in a spare webcam that I had and the Pi was able to use the webcam microphone as a standalone microphone! If you need a USB microphone, try it. Connect the speaker to the 3.5mm jack on the board and connect the USB microphone to one of the USB ports.
Start dev terminal :
sudo nano /etc/asound.conf

Delete all content and change it for this:

pcm.!default {
  type asym
  capture.pcm "mic"
  playback.pcm "speaker"
}
pcm.mic {
  type plug
  slave {
    pcm "hw:1,0"
  }
}
pcm.speaker {
  type plug
  slave {
    pcm "hw:0,0"
  }
}
Start dev terminal:
 nano /home/pi/voice-recognizer-raspi/checkpoints/check_audio.py

And let's change this line VOICEHAT_ID = 'googlevoicehat'
THEREFORE: VOICEHAT_ID = 'bcm2835'

In case it does not work we will have to do tests following these Configure and Test the Audi
Stay Secure Anywhere and Everywhere
The switch
The circuit for the switch is as follows:
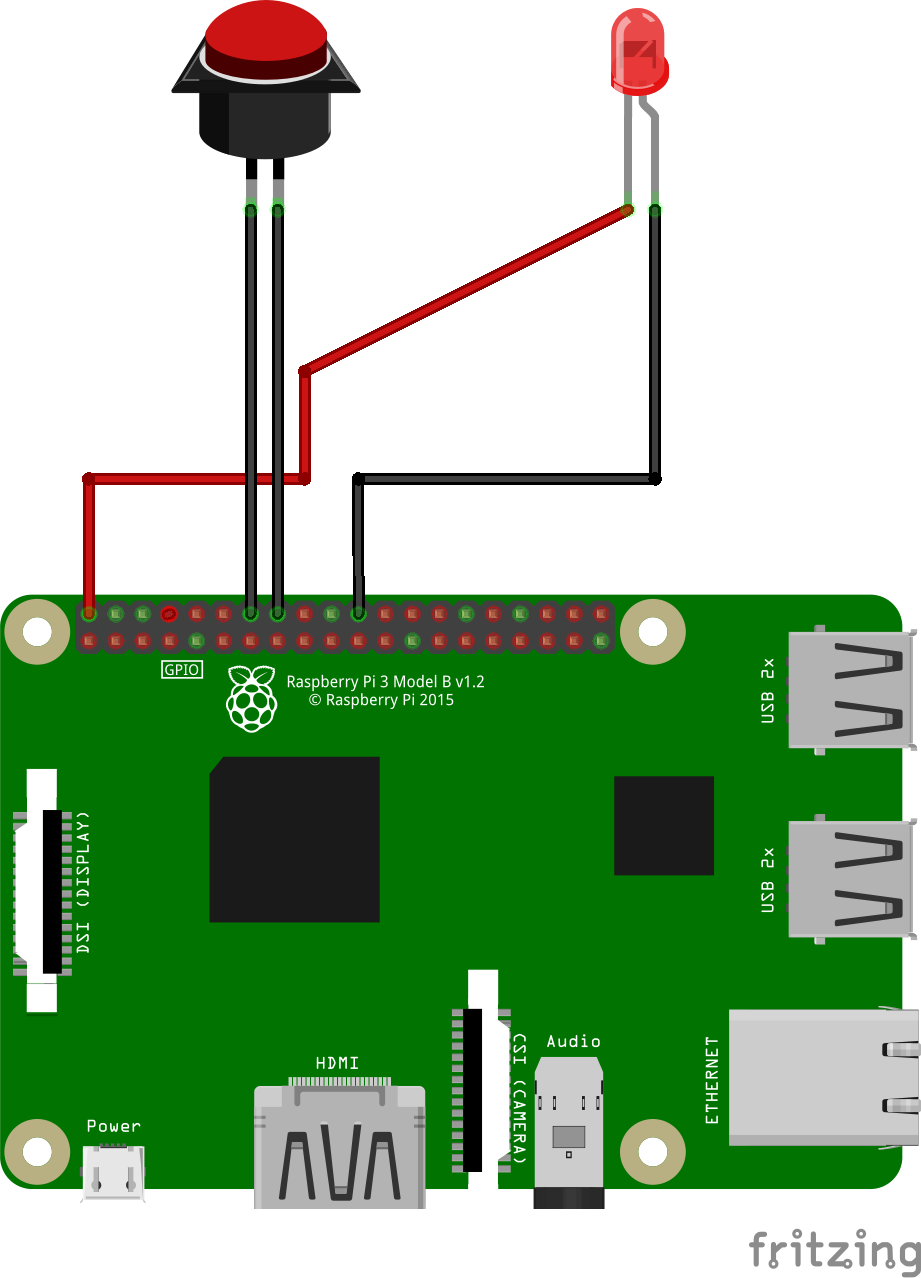

Once you have built your circuit, you must connect one side of the switch to GPIO 23 and the other side to ground, which is conveniently located on the next pin to the left of GPIO 23.
If you can not build the switch, even just short circuit GPIO 23 and earth will have the same effect!
LED:
LED negative to GPIO 25 and positive to GPIO + 5v
Try it:
You should now have everything you need to try Google Assistant on your Raspberry Pi. All you need to do is run the following command from the dev terminal:
src/main.py
To start automatically:
Edit rc.local
Command from the dev terminal:
sudo nano /etc/rc.local
systemctl enable voice-recognizer
Cntl-X, Return to save.
Please provide me,the each parts of this project. And the programming language. You used and how. How to program😁 pleaS please please please please please please please please please please please please 😊😚provide me photo
in this page right here you have all the parts list, all the amazon links.As you see there is a full video that I explain how to do it. I also included some photos on this page, follow the video and you will do it!